Home Makeovers and DIY projects are my FAVE!!!
Our small bathroom on the main level was soooooo boring and dated and an in desperate need of an upgrade! Prior to the remodel, the walls were cream and the cabinets were oak. The granite was already there and the light fixture was one of those old hollywood looking lights that you can get at Lowe’s for around $15.
To paint the cabinets:
- Remove the hardware
- Wipe Clean
- Sand with 80 Grit Sandpaper
- Vacuum to remove dust
- Prime (I used Zinsser Primer)
- Once primer is dry, Sand with Fine grit sand paper. I used 220
- Vacuum to remove dust
- If the woodgrain is still showing through more than you’d like, you can prime again and repeat the sanding with fine grit sand paper
- Then Paint:) I used a foam roller so that there were no brush marks on the cabinets.
I replaced the hardware with new pulls once the black paint was dry. I found the lion’s head pulls in the clearance bin at our local ACE Hardware! I love a deal!
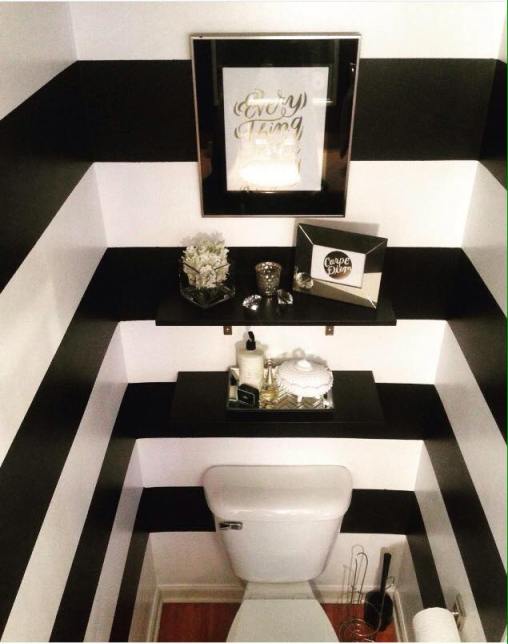
Then it was time for the walls. I filled in all the nail holes with spackle, let that dry and then sanded it even. I then painted the walls white. That took two coats.
I used a level and painters tape to tape off the stripes. I did 10 inch stripes and highly recommend using Frog Tape. In my experience it is the best, especially when using a dark color for striping. It never bleeds through it.
I painted the wall with the same black paint that I used on the cabinets using that same foam roller.
When the tape was removed…VOILA!!!! Instant glam!
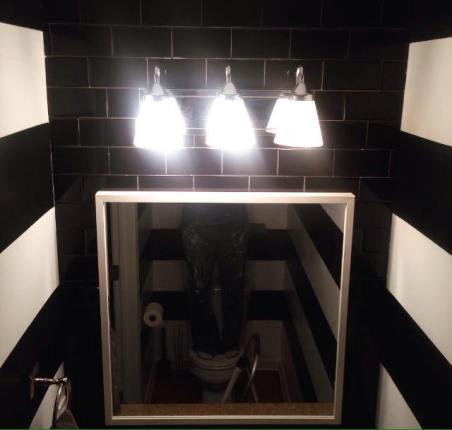
The Tile work was more complicated. We removed the builder’s grade mirror first and removed the light fixture.
We used black subway tiles from Lowe’s. We also purchased a wet tile saw from Lowe’s that was around $89 (worth every penny!!!). Then we went to town tiling behind the sink. Tiling is easy, but getting the cuts straight is so hard for me! After the tile was done, we installed the light fixture..
We are so pleased with the outcome!!!
